Difference between revisions of "VEYE MIPI 290/327 for Jetson Nano/zh"
Jump to navigation
Jump to search
(→系统更新) |
(→准备工作) |
||
| Line 33: | Line 33: | ||
====准备工作==== | ====准备工作==== | ||
| + | |||
| + | * 编译工具链 | ||
| + | |||
| + | 请参考[https://docs.nvidia.com/jetson/l4t/index.html#page/Tegra%2520Linux%2520Driver%2520Package%2520Development%2520Guide%2Fxavier_toolchain.html%23wwpID0ESHA 这个链接]安装编译工具链。 | ||
| + | |||
| + | * L4T源码和Rootfs | ||
| + | |||
| + | 可以通过SDK Manager或者[https://developer.nvidia.com/embedded/downloads 直接下载]两种方式来获得源码。具体参考官方文档,此处不再赘述。 | ||
| + | |||
| + | * 配置开发环境 | ||
| + | |||
| + | 以下步骤假设SDK安装目录为<TOPDIR>,源代码在$L4T_DIR/sources目录。 | ||
<br /> | <br /> | ||
====使用编译好的程序==== | ====使用编译好的程序==== | ||
Revision as of 16:20, 21 October 2019
1 概述
本文讲述怎样讲VEYE-MIPI-290/327 模组接入到英伟达公司的Jetson Nano开发板上。采用的Jetson Nano软件版本为r32.2.1,我们提供了编译好的固件和源代码两种方式来方便用户的使用。
VEYE-MIPI-290/327是星光级内置ISP的摄像头模组,输出为MIPI-CSI2接口UYVY流模式。对于图像效果参数,我们并没有采用V4L2接口实现,而是采用了Shell脚本直接控制摄像头模组。
2 硬件准备及安装
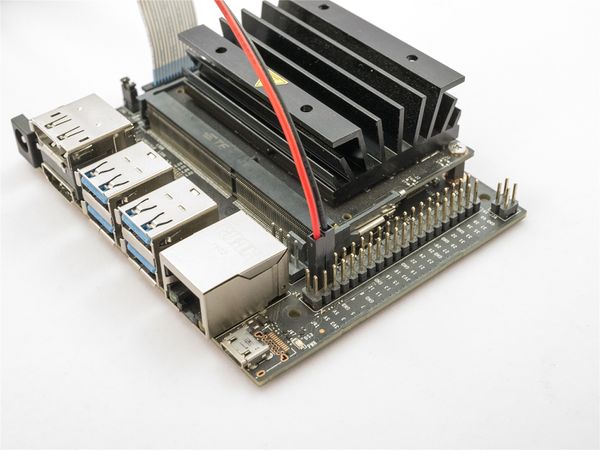
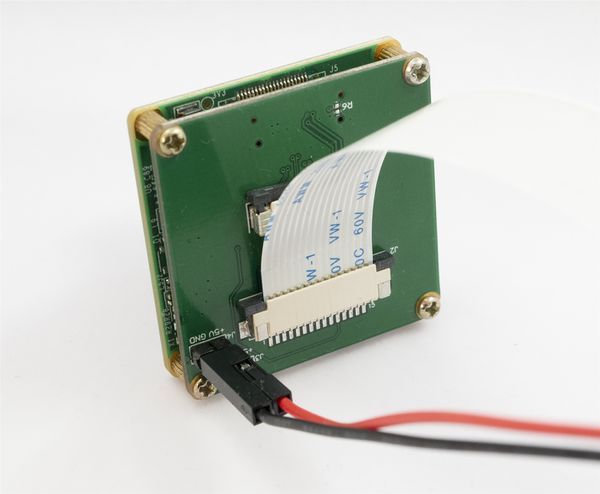
Jetson Nano的CSI2接口与树莓派的兼容,因此Mini Adapter Board与Adapter Board都可以使用。此外,由于VEYE-MIPI-290/327的功耗比较大,需要额外的5V供电。
3 软件系统安装及准备
Jetson Nano的系统安装及使用请参考官方文档:get-started-jetson-nano-devkit. 详细的开发资料请参考官方文档:https://docs.nvidia.com/jetson/archives/l4t-archived/l4t-321/index.html
3.1 开发环境准备
- Host PC which runs Ubuntu 16.04 (64-bit).
- NVIDIA® provided L4T release and corresponding sample rootfs for Jetson Nano™ development kit.
- A kernel image , device tree blob (DTB) file and module drivers for the VEYE-MIPI-290/327 camera. The release package contains a kernel binary (Image),DTB files and module drivers, which you can download and rebuild from source.
- A jumper pin connected across J48 button header to enable DC power.
- A USB cable (micro USB port) to plug into the recovery port of the Jetson Nano™
- development kit.
- Power cable (5V-4A) to power the Jetson Nano™ board.
- Micro SD card must be connected to the J501 slot.
- A jumper pin must be connected to the pin 3 and pin 4 of J40 button header.
4 系统软件更新
4.1 准备工作
- 编译工具链
请参考这个链接安装编译工具链。
- L4T源码和Rootfs
可以通过SDK Manager或者直接下载两种方式来获得源码。具体参考官方文档,此处不再赘述。
- 配置开发环境
以下步骤假设SDK安装目录为<TOPDIR>,源代码在$L4T_DIR/sources目录。
4.2 使用编译好的程序
4.3 整体烧写
4.4 使用源码进行编译
4.5 动态升级
5 应用和测试
5.1 视频流软件包和测试
5.2 视频控制软件包的使用


