VEYE CS Camera for Jetson TX2
How to use VEYE and CS series camera module on NVIDIA Jetson Nano,TX2,AGX Xavier and Xavier NX
1 Overview
This guide shows how to use VEYE and CS series camera modules on Jetson Nano,Jetson Nano 2GB,TX2,AGX Xavier and Xavier NX. Jetson SDK Version is
- Jetpack4.2.2,L4T r32.2.1
- Jetpack4.3,L4T r32.3.1
- Jetpack4.4,L4T r32.4.3
- Jetpack4.4.1,L4T r32.4.4
- Jetpack4.5,L4T r32.5
1.1 Check the current L4T version
First check the current L4T version and try to replace it with the same version.
cat /etc/nv_tegra_release
If it shows:
# R32 (release), REVISION: 4.3......
It means L4t Verion is 32.4.3
We provide two ways to do so: Prebuilt Binaries or Source Code. Yes, It's Open Source!
VEYE and CS series camera modules are camera module with ISP functions build in. It output UYVY data using MIPI-CSI2. We provide V4L2 interface for video streaming apps , and Video Control Toolkits (which is Shell Script) to control the camera module directly, which is called DRA(Directly Register Access).
2 Hardware Setup
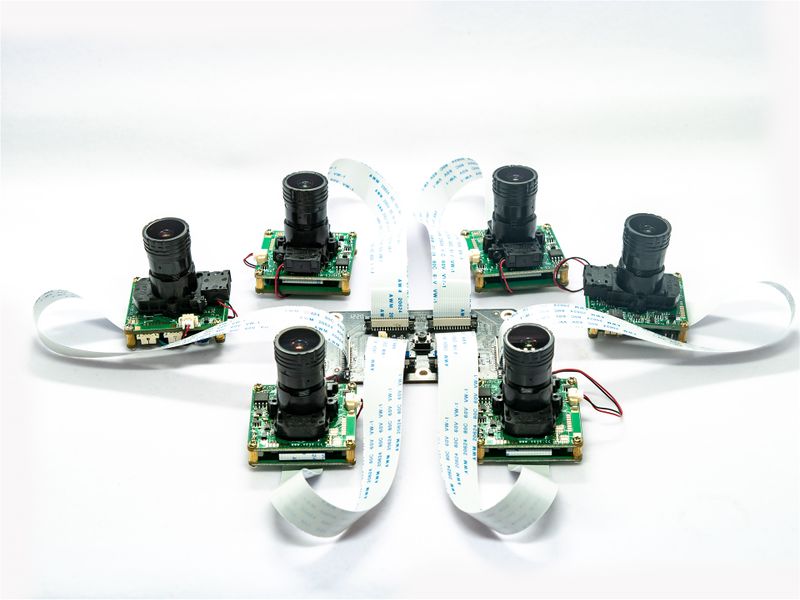
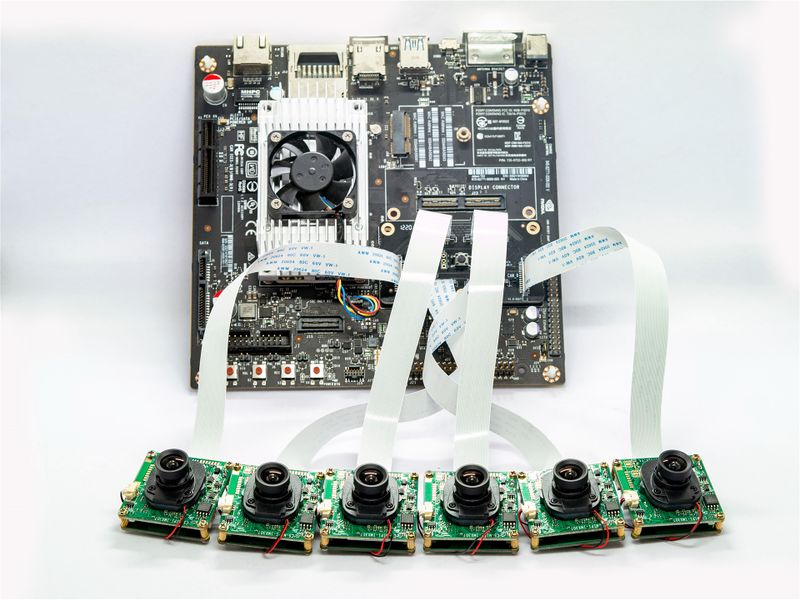
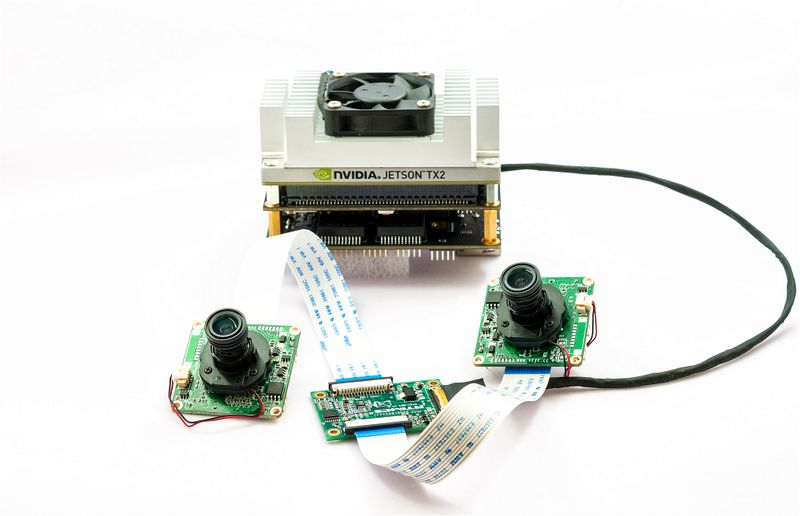
We have designed a 6cam interposer board for TX2 devkit and Xavier, It support up to 6 cameras at the same time.
2.1 NVIDIA TX2 Developer Kit
It is connected as shown in figure:
2.2 NVIDIA TX2 AGX Xavier
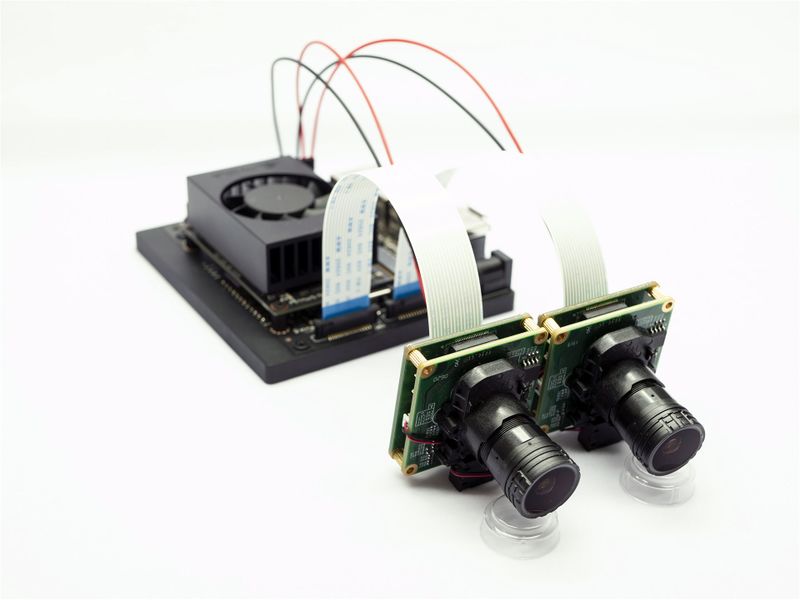
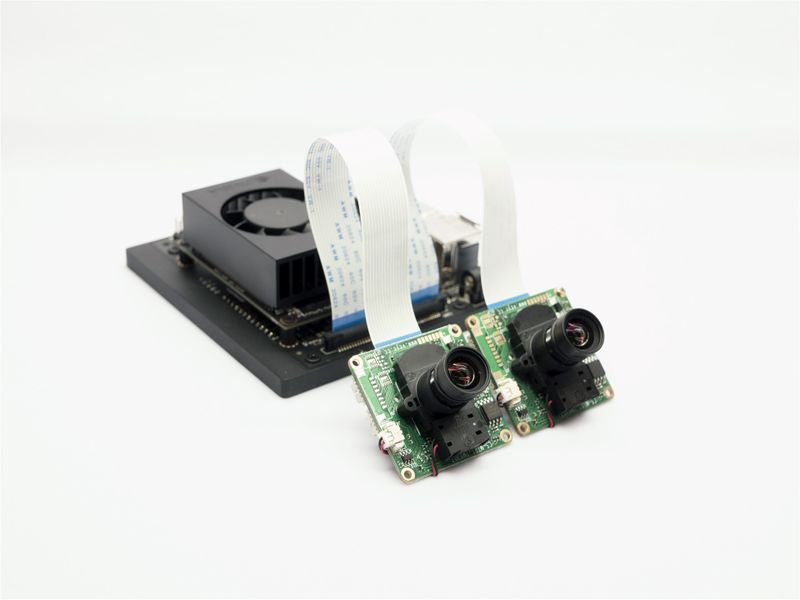
2.3 NVIDIA Nano 和 Xavier NX Devkit
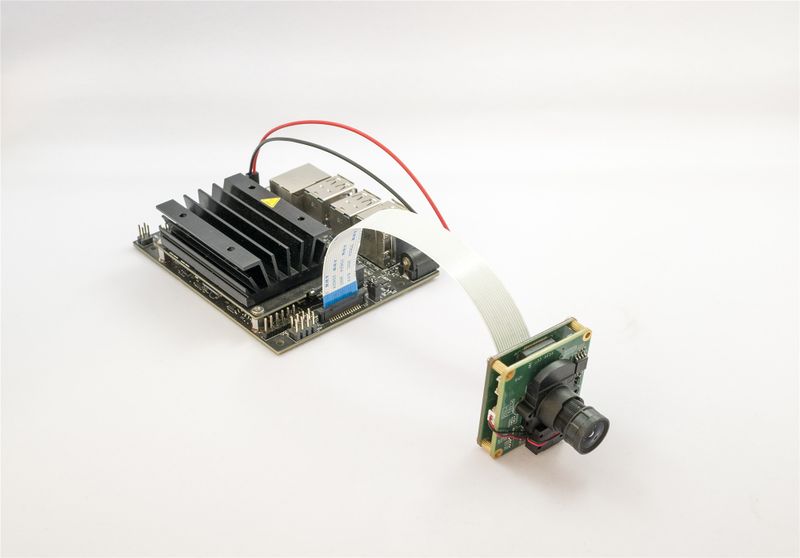
The Xavier NX interface is compatible with raspberry pi and Jetson Nano. The connection mode is shown in figure:
3 Upgrade Jetson Nano, Jetson TX2, AGX Xavier and Xavier NX system
3.1 Overview
This section describes how to upgrade the Jetson system to support our camera module. To support our camera module, we need to update the two parts of the L4T (Linux for Tegra) of the Jetson system, Image and DTB.
In the Image, we added the camera driver, while the DTB indicates the camera model used. In general, you only need to use the Image and DTB, that we have prebuilt, and you don't need to build from source when it is not necessary.
In particular, for Xavier NX, we provide a burning image of the TF card.
3.2 Burning the prebuilt Image to upgrade Jetson Nano and Xavier NX Devkit
This method is no longer recommended because in this mode, the DTB partition reverts to the default value in some cases. It is recommended to use pre-compiled Image and DTB for driver upgrade.
You can use the image prebuild by us to upgrade jetson Xavier NX system, which will support our camera.
Using whole prebuilt image
- download :
baiduyun:https://pan.baidu.com/s/1sWrcfEOivjuQ7T7P5bVcng
google driver:https://drive.google.com/drive/folders/1KHSMTdyw-ZczR1yJPj-5y9eIv7izbgt3?usp=sharing
If Baidu cloud disk download is too slow, you can contact our company customer service xumm@csoneplus.com to obtain.
- How to burn
refer to Official document
3.3 BSP package introduction
3.3.1 Path
https://github.com/veyeimaging/nvidia_jetson_veye_bsp
3.3.2 bsp package includes:
- prebuild linux kernel:Image
- prebuild dtb for different boards
- driver source code
- dts source code
- i2c toolkits
3.4 DTB file name and Jeton Board
3.4.1 Nano A02
tegra210-p3448-0000-p3449-0000-a02.dtb
3.4.2 Nano B01
tegra210-p3448-0000-p3449-0000-b00.dtb
3.4.3 Nano 2GB
tegra210-p3448-0003-p3542-0000.dtb
3.4.4 TX2 Devkit
tegra186-quill-p3310-1000-c03-00-base.dtb
3.4.5 AGX XAVIER
tegra194-p2888-0001-p2822-0000.dtb
3.4.6 XAVIER NX Devkit
tegra194-p3668-all-p3509-0000.dtb
3.5 Upgrade Jetson Nano and Xavier NX 、AGX Xavierwithout HOST PC
Note: AGX Xavie Jetpack version >= 4.5 , support this upgrade mode. Earlier versions have not been verified and are not recommended.
3.5.1 Check the current L4T version
First check the current L4T version and try to replace it with the same version.
cat /etc/nv_tegra_release
If it shows:
# R32 (release), REVISION: 4.3......
It means L4t Verion is 32.4.3
3.5.2 Download the bsp package to the Jetson board
On Jetson Nano or Xavier NX:
git clone https://github.com/veyeimaging/nvidia_jetson_veye_bsp.git
3.5.3 Upgrade Image
First, under the bsp package directory, find the corresponding version of the Image package, decompress it, and execute:
sudo cp <path to your Image dir>/Image /boot/Image -f
For Xavier NX Devkit
Need to use the signed file(For example,file inside Image_l4t_r32.*.*_veyecam_signed_4_xavier),copy Image and Image.sig to /boot/ dir on the Jetson Xavier board:
sudo cp <path to your Image dir>/Image /boot/Image -f
sudo cp <path to your Image dir>/Image.sig /boot/Image -f
Effective after restart.
3.5.4 Upgrade dtb
Under the bsp package directory, find the dtb file corresponding to your camera module model and L4T version number.
sudo cp <path to your dtb dir>/<DTB file name> /boot/ -f
Then, edit the / boot/extlinux/extlinux.conf file and add the following line.
FDT /boot/<DTB file name>
Effective after restart.
3.6 Upgrade Jetson Board using Host PC
3.6.1 Setting Up the Host PC Environment And Burn the standard Image
Note: if your Jetson board has correctly burned the standard version Image, you can skip this step.
- Cross-compiling Toolchain
Please refer to this link to install toolchain on your Host PC.
- L4T source code and Rootfs
You could use SDK Manager or directly download to get source code.
Sync code as this if you use SDK Manager:
- Jetpack4.2.2
./source_sync.sh -t tegra-l4t-r32.2.1
- Jetpack4.3
./source_sync.sh -t tegra-l4t-r32.3.1
- Jetpack4.4
./source_sync.sh -t tegra-l4t-r32.4.3
- Jetpack4.4.1
./source_sync.sh -t tegra-l4t-r32.4.4
- Jetpack4.5
./source_sync.sh -t tegra-l4t-r32.5
- Setting Up the Environment
Assume SDK install directory is <TOPDIR>,source code is in $L4T_DIR/sources directory.
- Nano@Jetpack4.2.2
export TOP_DIR=<absolute path to top dir;in my case is /home/xumm/nvidia/nvidia_sdk/JetPack_4.2.2_Linux_GA_P3448/>
- Nano@Jetpack4.3
export TOP_DIR=<absolute path to top dir;in my case is /home/xumm/nvidia/nvidia_sdk/JetPack_4.3_Linux_JETSON_NANO_DEVKIT/>
- Nano@Jetpack4.4
export TOP_DIR=<absolute path to top dir;in my case is /home/xumm/nvidia/nvidia_sdk/JetPack_4.4_Linux_JETSON_NANO_DEVKIT/>
- Nano@Jetpack4.4.1
export TOP_DIR=<absolute path to top dir;in my case is /home/xumm/nvidia/nvidia_sdk/JetPack_4.4.1_Linux_JETSON_NANO_DEVKIT/>
- Nano 2GB@Jetpack4.4.1
export TOP_DIR=<absolute path to top dir;in my case is /home/xumm/nvidia/nvidia_sdk/JetPack_4.4.1_Linux_JETSON_NANO_2GB_DEVKIT/>
- TX2@Jetpack4.2.2
export TOP_DIR=/home/xumm/nvidia/nvidia_sdk/JetPack_4.2.2_Linux_GA_P3310/
- TX2@Jetpack4.3
export TOP_DIR=/home/xumm/nvidia/nvidia_sdk/JetPack_4.3_Linux_P3310/
- TX2@Jetpack4.4
export TOP_DIR=/home/xumm/nvidia/JetPack_4.4_Linux_JETSON_TX2/
- AGX XavierJetpack4.2.2
export TOP_DIR=/home/xumm/nvidia/nvidia_sdk/JetPack_4.2.2_Linux_GA_P2888/
- AGX XavierJetpack4.3
export TOP_DIR=/home/xumm/nvidia/nvidia_sdk/JetPack_4.3_Linux_P2888/
- AGX XavierJetpack4.4
export TOP_DIR=/home/xumm/nvidia/nvidia_sdk/JetPack_4.4_Linux_JETSON_AGX_XAVIER/
- AGX XavierJetpack4.4.1
export TOP_DIR=/home/xumm/nvidia/nvidia_sdk/JetPack_4.4.1_Linux_JETSON_AGX_XAVIER/
- Xavier NX Jetpack4.4
export TOP_DIR=/home/xumm/nvidia/nvidia_sdk/JetPack_4.4_Linux_JETSON_XAVIER_NX_DEVKIT
- Xavier NX Jetpack4.4.1
export TOP_DIR=/home/xumm/nvidia/nvidia_sdk/JetPack_4.4.1_Linux_JETSON_XAVIER_NX_DEVKIT
- Common part
export L4T_DIR=$TOP_DIR/Linux_for_Tegra
export LOCALVERSION=-tegra
export LDK_ROOTFS_DIR=$TOP_DIR/Linux_for_Tegra/rootfs
export ARCH=arm64
export CROSS_COMPILE=aarch64-linux-gnu-
export CROSS32CC=arm-linux-gnueabihf-gcc
export TEGRA_KERNEL_OUT=$L4T_DIR/sources/kernel/out_kernel
export KERNEL_PATH=$L4T_DIR/sources/kernel/out_kernel
export NVIDIA_PATH=$L4T_DIR/sources/kernel/nvidia
export NANO_DTS_PATH=$L4T_DIR/sources/hardware/nvidia/platform/t210/
export TX2_DTS_PATH=$L4T_DIR/sources/hardware/nvidia/platform/t18x
export XAVIER_DTS_PATH=$L4T_DIR/sources/hardware/nvidia/platform/t19x
cd $L4T_DIR/sources/kernel/kernel-4.9/
- Build default image, flashing to Jetson Board, prepare L4T environment
cd $L4T_DIR
sudo ./apply_binaries.sh
- Nano
sudo ./flash.sh jetson-qspi-sd mmcblk0p1
sudo ./flash.sh jetson-nano-devkit mmcblk0p1
sudo ./flash.sh jetson-nano-2gb-devkit mmcblk0p1
- TX2
sudo ./flash.sh jetson-tx2 mmcblk0p1
- AGX Xavier
sudo ./flash.sh jetson-xavier mmcblk0p1
- Xavier NX Devkit
sudo ./flash.sh jetson-xavier-nx-devkit mmcblk0p1
3.6.2 Download our bsp package for Jetson
cd $L4T_DIR
git clone https://github.com/veyeimaging/nvidia_jetson_veye_bsp.git
export RELEASE_PACK_DIR=$L4T_DIR/nvidia_jetson_veye_bsp
3.6.3 Upgrade Image and DTB
prebuilt Image on github:https://github.com/veyeimaging/nvidia_jetson_veye_bsp/tree/master/kernel_image
- Installing the Kernel
Whether you use a prebuild kernel or you build it yourself
- Nano and TX2
copy Image to /boot/ dir on the Jetson Nano or TX2 board:
sudo cp <path to your Image dir>/Image /boot/Image -f
- AGX Xavier and Xavier NX Devkit
Need to use the signed file(For example,file inside Image_l4t_r32.*.*_veyecam_signed_4_xavier),copy Image and Image.sig to /boot/ dir on the Jetson Xavier board:
sudo cp <path to your Image dir>/Image /boot/Image -f
sudo cp <path to your Image dir>/Image.sig /boot/Image -f
on the Host PC:
cd $L4T_DIR
sudo ./flash.sh -k kernel jetson-xavier mmcblk0p1
- Xavier NX
on the Host PC:
cd $L4T_DIR
sudo ./flash.sh -k kernel jetson-xavier-nx-devkit mmcblk0p1
- Flashing dtb file
Enter the recovery mode,and on the Host PC:
cp <path to your dtb dir>/dtbfilename $L4T_DIR/kernel/dtb/ -f
cd $L4T_DIR
- Nano
sudo ./flash.sh -r -k DTB jetson-nano-qspi-sd mmcblk0p1
sudo ./flash.sh -r -k DTB jetson-nano-devkit mmcblk0p1
sudo ./flash.sh -r -k DTB jetson-nano-2gb-devkit mmcblk0p1
- TX2
sudo ./flash.sh -r -k kernel-dtb jetson-tx2 mmcblk0p1
- AGX Xavier
sudo ./flash.sh -r -k kernel-dtb jetson-xavier mmcblk0p1
- Xavier NX
sudo ./flash.sh -r -k kernel-dtb jetson-xavier-nx-devkit mmcblk0p1
Reset Jetson Board after flashing.
3.7 Are Image and DTB upgrade successful ?
3.7.1 For Image
ls /sys/bus/i2c/drivers/
There should have veye327 csx307 cssc132 directory.
3.7.2 For DTB
DTB varies from platform and from camera module.
- Nano A02/ Nano 2G
ls /proc/device-tree/host1x/i2c@546c0000/
- Nano B01
ls /proc/device-tree/cam_i2cmux/i2c@*
- TX2 Devkit
ls /proc/device-tree/i2c@3180000/tca9548@70/i2c@*
- AGX Xavier
ls /proc/device-tree/i2c@3180000/tca9548@70/i2c@*
- Xavier NX
ls /proc/device-tree/cam_i2cmux/i2c@*
You should be able to find the camera model you used.
3.8 Building from Source
Please refer to: Nvidia Jetson platform VEYE and CS series camera driver source code compilation guide.
Could be used for Flashing or Upgrading.
4 Applications and Test
4.1 Check system status
Run the following command to confirm whether the camera is probed.
- For VEYE-MIPI-327
dmesg | grep veye327
The output message appears as shown below.:
Detected VEYE327 sensor
subdev veye327 X-003b bound
- For CS-MIPI-IMX307
dmesg | grep csx307
The output message appears as shown below.:
Detected CS307 sensor
subdev csx307 X-003b bound
- For CS-MIPI-SC132
dmesg | grep cssc132
The output message appears as shown below.:
subdev cssc132 X-003b bound
- Run the following command to check the presence of video node.
ls /dev/video*
The output message appears as shown below.
videoX
4.2 Video Stream Toolkits Manual
Our camera appears as /dev/videoX device node,where X is between [0-5].
in gstreamer command ,v4l2src has a param device=/dev/videoX to identify which camera to use.
4.2.1 Gstreamer Usage
- Preview FHD(HW accelerated)
gst-launch-1.0 v4l2src device=/dev/video0 ! "video/x-raw,format=(string)UYVY, width=(int)1920, height=(int)1080" ! nvvidconv ! "video/x-raw(memory:NVMM),format=(string)I420" ! nvoverlaysink sync=false
- Preview FHD(using xvimagesink sink)
export DISPLAY=:0
gst-launch-1.0 -e v4l2src io-mode=4 device=/dev/video0 do-timestamp=true ! 'video/x-raw, width=1920, height=1080, framerate=30/1, format=UYVY' ! xvimagesink sync=false
- Preview 720p@60 (CS-MIPI-IMX307,HW accelerated)
gst-launch-1.0 v4l2src ! "video/x-raw,format=(string)UYVY, width=(int)1280, height=(int)720, framerate=(fraction)60/1" ! nvvidconv ! "video/x-raw(memory:NVMM),format=(string)I420" ! nvoverlaysink sync=false
- Preview 1280*1080@45 (CS-MIPI-SC132,HW accelerated)
gst-launch-1.0 v4l2src ! "video/x-raw,format=(string)UYVY, width=(int)1280, height=(int)1080, framerate=(fraction)45/1" ! nvvidconv ! "video/x-raw(memory:NVMM),format=(string)I420" ! nvoverlaysink sync=false
- Preview 640*480p@130 (CS-MIPI-IMX307,HW accelerated)
gst-launch-1.0 v4l2src ! "video/x-raw,format=(string)UYVY, width=(int)640, height=(int)480, framerate=(fraction)130/1" ! nvvidconv ! "video/x-raw(memory:NVMM),format=(string)I420" ! nvoverlaysink sync=false
- Preview 2 cameras 1080p HD(HW accelerated)
WIDTH=960
HEIGHT=540
CAPS="video/x-raw,format=(string)UYVY, width=1920, height=1080"
gst-launch-1.0 nvcompositor name=comp sink_0::xpos=0 sink_0::ypos=0 sink_0::width=$WIDTH sink_0::height=$HEIGHT sink_1::xpos=$WIDTH sink_1::ypos=0 sink_1::width=$WIDTH sink_1::height=$HEIGHT ! nvoverlaysink v4l2src device=/dev/video0 ! $CAPS ! nvvidconv ! "video/x-raw(memory:NVMM),format=(string)I420"! comp. v4l2src device=/dev/video1 ! $CAPS ! nvvidconv ! "video/x-raw(memory:NVMM),format=(string)I420"! comp.
- Gstreamer cmd line for OpenCV
I think maybe OpenCV do not support I420 data format input,so you should convert it to BGR format.
gst-launch-1.0 v4l2src ! video/x-raw, format=(string)UYVY, width=(int)1920, height=(int)1080 ! nvvidconv ! video/x-raw(memory:NVMM), format=(string)I420 ! nvvidconv ! video/x-raw, format=(string)BGRx ! videoconvert ! video/x-raw, format=(string)BGR ! appsink
- Record FHD in H.264 format to a video file(HW accelerated)
gst-launch-1.0 v4l2src num-buffers=300 ! "video/x-raw,format=(string)UYVY, width=(int)1920, height=(int)1080" ! nvvidconv ! "video/x-raw(memory:NVMM),format=(string)I420" ! omxh264enc qp-range=20,20:20,20:-1,-1 ! matroskamux ! queue ! filesink location=videoname.mkv
- Playback of saved video file (HW accelerated)
gst-launch-1.0 filesrc location=videoname.mkv ! matroskademux ! h264parse ! omxh264dec ! nvoverlaysink
- Capturing FHD still image
gst-launch-1.0 v4l2src num-buffers=1 ! "video/x-raw,format=(string)UYVY, width=(int)1920, height=(int)1080" ! jpegenc ! filesink location=jpgname.jpg
4.3 Video Control Toolkits Manual
- i2c bus description:
For AGX-Xavier and TX2, ADP-N1 has 6 MIPI CSI-2 interface [A-F],the corresponding i2c address is[30-35].
For Xavier NX, the corresponding i2c address is 9 and10.
For Nano A02, the corresponding i2c address is 6.
For Nano B01, the corresponding i2c address is 7 and 8.
It is also the same as the X part of dmesg message:
subdev veye327 X-003b bound
subdev csimx307 X-003b bound
subdev cssc132 X-003b bound
using -b option to identify which bus you want to use.
- VEYE-MIPI-327
Video Control Toolkits Manual :VEYE-MIPI-327 I2C
- CS-MIPI-IMX307和CS-MIPI-SC132
Video Control Toolkits Manual :CS-MIPI-X I2C
5 Realtimes RTSO-9001
5.1 Hardware Setup
Matching with Realtimes RTSO-9001, you need to use RTST-RPI adapter board.
Note: the power supply capacity of the MIPI CSI-2 interface of the current version of RTSO-9001 is not enough to support the power requirements of our camera, which requires an additional 5V power supply to the camera. It is not shown in the picture above.
5.2 Software bsp
- The corresponding directory for Realtimes RTSO-9001, is:
nvidia_jetson_veye_bsp\TX2\JetPack_4.2.2_Linux_RTSO-9001
- Subject to the agreement with Ruitai, we do not release the source code
- Our code have been submitted to Realtimes, and customers are advised to contact Realtimes for a complete version of the supported image.
6 References
Jetson start up: https://developer.nvidia.com/embedded/learn/getting-started-jetson
Jetson Download Center: https://developer.nvidia.com/embedded/downloads
Xavier NX: https://developer.nvidia.com/embedded/learn/get-started-jetson-xavier-nx-devkit
TX2 development kit: https://developer.nvidia.com/embedded/jetson-tx2-developer-kit
SDK Manager: https://docs.nvidia.com/sdk-manager/index.html
L4T Doc: https://docs.nvidia.com/jetson/archives/l4t-archived/l4t-3242/index.htm
TX2 user guide: link
Realtimes website:http://www.realtimes.cn/
